Four quick steps use Outlook for Mac with Zimbra at XMission
Today we talk about how to configure Outlook for Mac with your Zimbra mailbox.
Microsoft Outlook for Mac functionality requires Microsoft Exchange Web Service (EWS) licensing to be activated for your mailbox on the server. Domain admins and mailbox owners can contact XMission to add the feature to Zimbra Premium or Personal Premium mailboxes. There is a small $0.25 per month charge for this licensing.
Lets jump in!
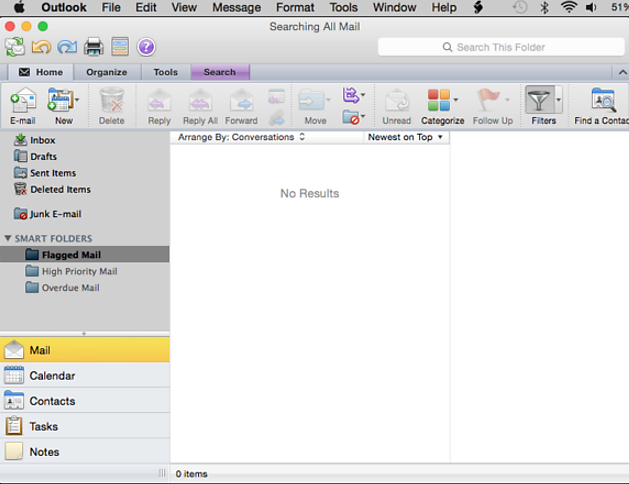
1. Open up Outlook on your Mac computer.
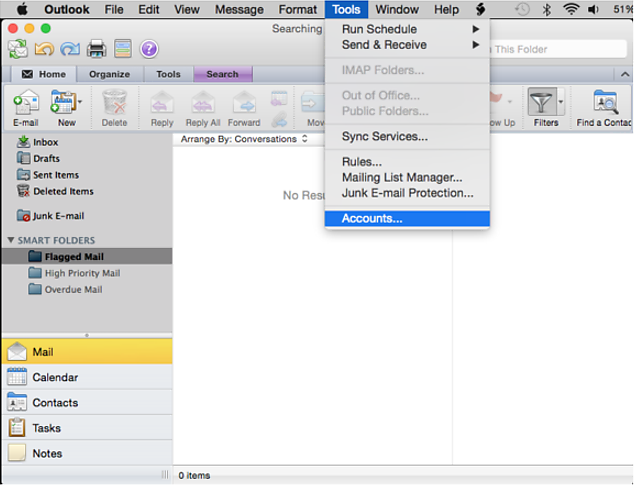
2. Click on “Tools” and click on “Accounts…”.
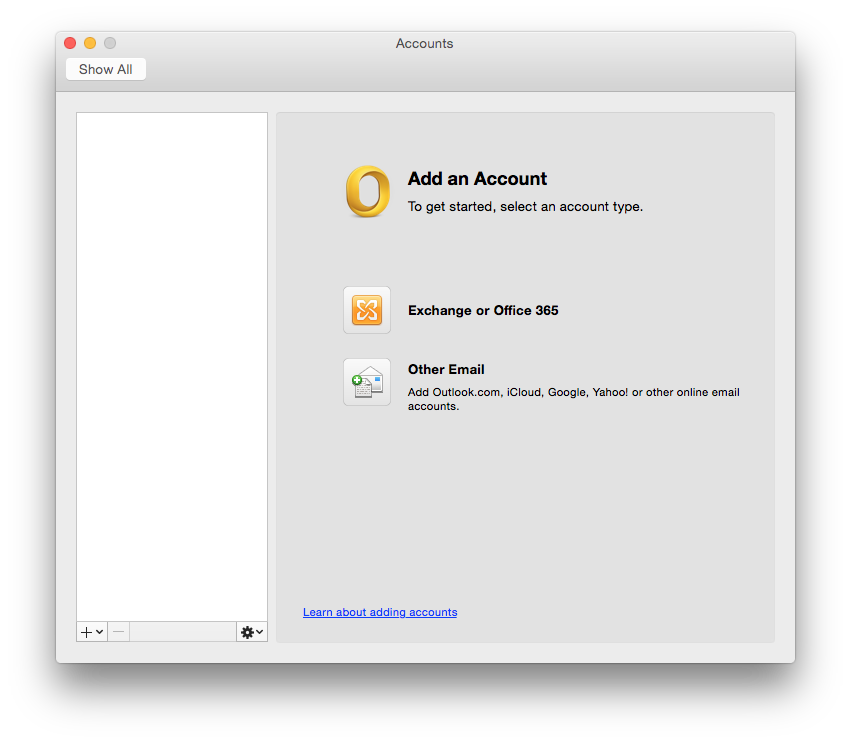
3. In the window that opens, click on “Exchange or Office 365”.
4. The next windows ask for the account information. Fill in your information accordingly, just like the image below. Make sure that “Configure Automatically” is unchecked, the server field won’t show until you do. When you’re finished, click “Add Account” and you’re finished!
Don’t forget, XMission technical support is here for you 24 hours-a-day to help with any Zimbra support questions.
Articles like this and other useful Mac configurations can be found on our support wiki.
Outlook for Mac: https://wiki.xmission.com/Hosted_Email:Outlook_Exchange_on_Mac
Thunderbird for Mac: https://wiki.xmission.com/Hosted_Email:Thunderbird_Mac
Mac Mail with Zimbra: https://wiki.xmission.com/Mac_Mail
Please leave comments, post questions, or share your experiences below.
John Webster, XMission Email Product Manager and Zimbra evangelist, has worked at XMission for over 20 years doing his favorite thing: helping companies communicate with customers through technology to grow their business. When he’s not uncovering Zimbra’s secrets you might find him in our beautiful Utah mountains. Connect with him on LinkedIn today!
Sharpen Your Skills and Meet New Friends at OpenWest 2016 Easily Encrypt & Sign Email with Zimbra and OpenPGP


Comments are currently closed.