Understanding your Unlimited Web Hosting account
 So you setup an Unlimited Web Hosting account with XMission and now your website is up but with a default template rather than your content. Yikes! You need to fix this but are completely confused as to where to log in to find anything and what credentials to use.
Let’s make sense of it all.
Your XMission Unlimited Web Hosting account lets you host a lot of websites on a single account. It has a Control Panel where you set up your domains and sites, as well as install applications.
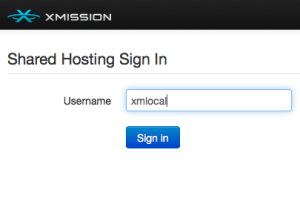
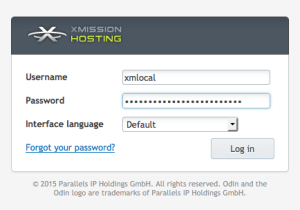
To log in to the hosting control panel go to https://hosting.xmission.com. Here is where your confusion may start. What credentials do you use to login? With this account type it is commonly a variant of your primary domain as your “Username”. In this example we are using “xmlocal” for the domain “xmlocal.com”. Hit “Sign in” and the system will take you to the server your websites host on and prompt you to enter both your username and password as created when you registered the account.
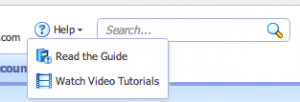
That logged us into the control panel and the back-end system so we can manage things. When you need help understanding the control panel we have very useful wiki help pages at: https://wiki.xmission.com/Unlimited_Hosting. Note that in addition to the included documentation you will find information by clicking on the “?” in the top right of the control panel.
Now that you have a basic understanding of the XMission hosting control panel let’s talk about managing your active sites on your hosting account as it is slightly different. Let’s say you have a WordPress, Joomla, or Drupal site. To work on the site, go to the login screen specific to the site and application.
For example, most hosting customers prefer WordPress in which case your site login would be http://yourdomain.tld/wp-login.php. If you used the one-click install or hired a consultant to setup your WordPress site, your login username most likely matches the hosting panel login and utilizes a secure password. Inside WordPress it is possible to go in and update settings such as different admin names, associated accounts, templates, and themes. In other words, a default theme is established to get the site running.
Now that you are in the control panel with the application running for your website, you can edit away! To add or migrate a WordPress site to your XMission control panel try this handy tutorial.
Once your site becomes popular, or you need help with customer applications, you may outgrow the shared hosting service. Don’t worry though as we have you covered. XMission Managed Cloud is the perfect fit.
XMission Hosting accounts provide basic, domain-based email services, but they are somewhat generic and count against measured resources on the account. Organizations with enhanced email and collaboration requirements benefit from our business email solution.
Thank you for reading and please feel free to ask any questions by posting in the comments below.
John Webster, VP of Business Development and Zimbra Email Product Manager, has worked at XMission for 20 years doing his favorite thing: helping companies communicate with customers through technology to grow their business. When he’s not uncovering Zimbra’s secrets you might find him in our beautiful Utah mountains. Connect with him on LinkedIn today!
Premium and Base Zimbra XMission mailboxes, a tell all PHP + Powder = Perfect Day! XMission proudly sponsors 2016 Ski PHP Conference.


Comments are currently closed.