Setting up and customizing WordPress on XMission Unlimited Shared Hosting
![]()
The information in this article only pertains to setting up WordPress under XMission Unlimited Shared Hosting. Other web hosting services will vary greatly, so just keep it simple and use XMission.
WordPress is a popular, free, full-featured blogging tool and CMS (Content Management System) which is a great solution for many website needs. There is a plethora of plug-ins, help guides and other resources on the net to assist WordPress site operators in creating a rich user experience.
Setting up WordPress on your XMission shared hosting is a breeze, and I’ll walk you through that as well as basic customizations of your WordPress website. In future posts, I will cover implementation, more advanced customizations, and features.
- Start by pointing your browser at hosting.xmission.com and login with the account information you created when you ordered XMission hosting. This user/password information is also emailed to the address you specify when setting up the hosting account.
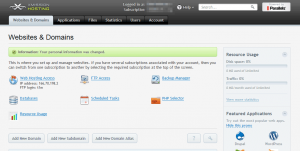
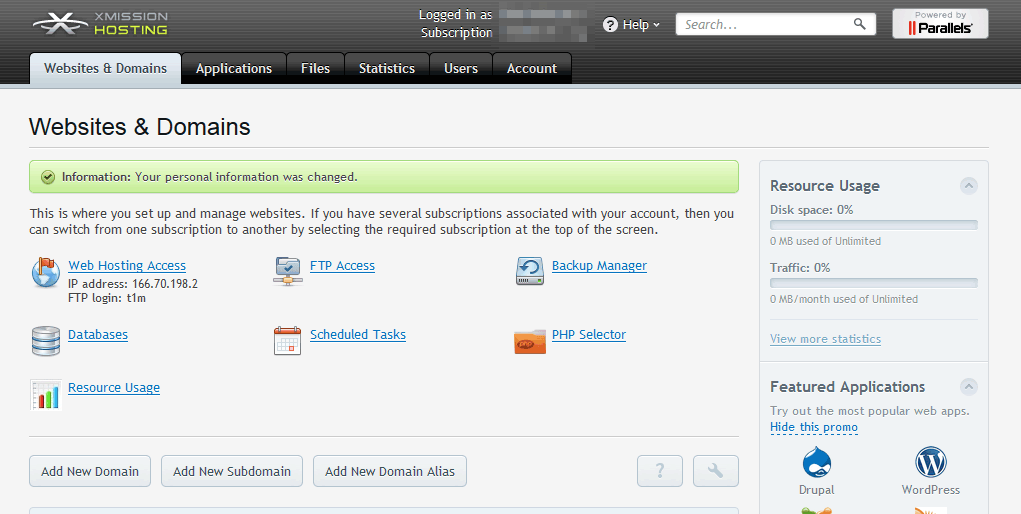
- When you are successfully logged in you will see the Parallels Plesk Control Panel screen, as shown:
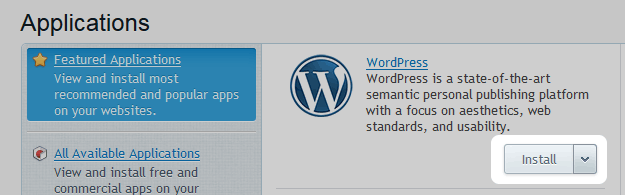
- Click the Applications tab, and then click the Install button. This will install WordPress with the default options.
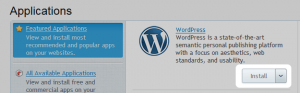 If you want to customize options, click the drop down arrow and choose Install (custom). By default, WordPress will install to a folder named “wordpress”, so the URL would be http://yourdomain.com/wordpress. You may want to install WordPress in your root folder so it can be reached via simply http://yourdomain.com. To do this, select Install (custom) and blank out the folder field on the “Installation of WordPress” page, as shown:
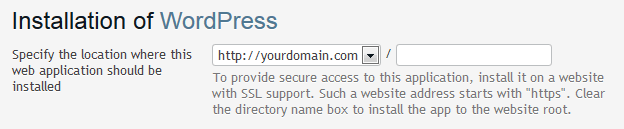
- Wait a few moments for the installation to complete, then you will be greeted with a success message and some links. To preview your WordPress site, you can click Blog under Public access entry points in the right column.
Now comes the fun part, customizing your WordPress site!
- From the right column on the XMission Hosting / WordPress page, select Administrative Interface to be logged in automatically to your WordPress Admin Panel. The admin panel can also be reached directly via http at yourdomain.com/wordpresspath/wp-admin. Your WordPress admin login user/password is the same as your XMission hosting account user/password.
- From the admin panel left menu, choose Appearance / Themes. Your current theme will be named with a preview image at screen top. Let’s go ahead and jump over to the Install Themes tab and pick a new one.
- You can search on a keyword for your theme, or select a link such as Featured or Newest to start seeing options. When you find a theme you like, click Install now under the preview image. WordPress will give you feedback about your installation, and then present some links. Choose Activate to make your new theme active.
- Each theme has different customization options. Click the Customize link to manage items like colors, background images, etc. Don’t be afraid to play around and experiment. If you break something, you can always re-install the theme and start over. However, it’s pretty unlikely you will be able to break your website through the Customize options, unless you try very hard.
- I recommend selecting your theme before adding content and other media, as different themes have different sizing schemes and element visibility. You can customize your theme even more through use of custom CSS and the template editor – I’ll cover that in a future blog post. Once you are happy with your theme, jump over to Settings > General from the WordPress Admin left menu, bottom option. Here you can set your site title, tagline, email address for notifications, and other options.
You and your website are now ready to conquer the world! Check this blog regularly for more hints and tips for expanding the functionality and experience of your WordPress website. Then, the galaxy!
5 Questions Customers Commonly Ask + Our Best Answers Zimbra Power Tip: Improve your day and your inbox with filters.
Comments are currently closed.